Fixing the scroll wheel on the Microsoft Arc Mouse

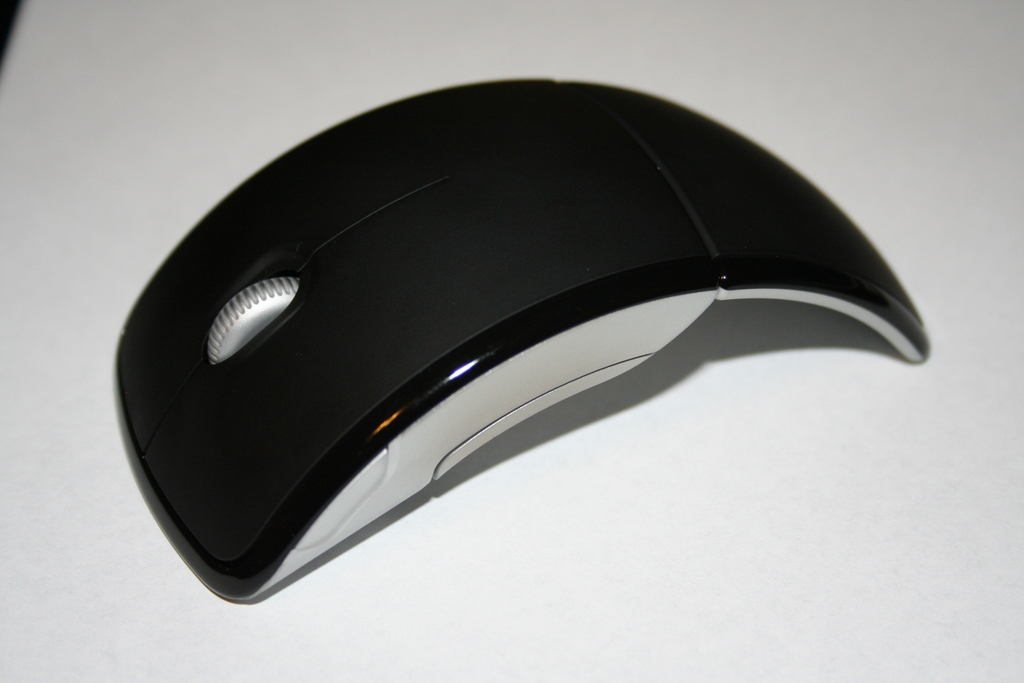
When I saw the Microsoft Arc Mouse in the retail store recently I just had to have it, the cool factor was high in my opinion. So I paid some $60 plus tax and took it home to play with.

After about one month of use the scroll wheel was intermittently working (it would click some of the time), then it stopped working (clicking) altogether in about 2 months.

When the wheel stopped working, I searched around the Internet and noticed many more people where having this exact same problem. Some had the mouse wheel stop within a couple weeks, and others in several days.

What follows is an account of how I fixed my mouse. I believe that this wheel problem is DESIGN related and here is what I did to fix it (for now).

*** START DISCLAIMER ***

If you are NOT TECHNICALLY INCLINED (or have the right tools) to fix your mouse please use the correct support procedures outlined by your retailer or Microsoft to get one that works or your money back for a different mouse. Following this procedure to fix your mouse will likely VOID the warranty!

*** END DISCLAIMER ***

Ok, now on with what I did … I could not take the mouse back to the retailer due to length of return time and I did not want to deal with MS support (more effort & energy than it’s worth) to get a replacement that will just break again.

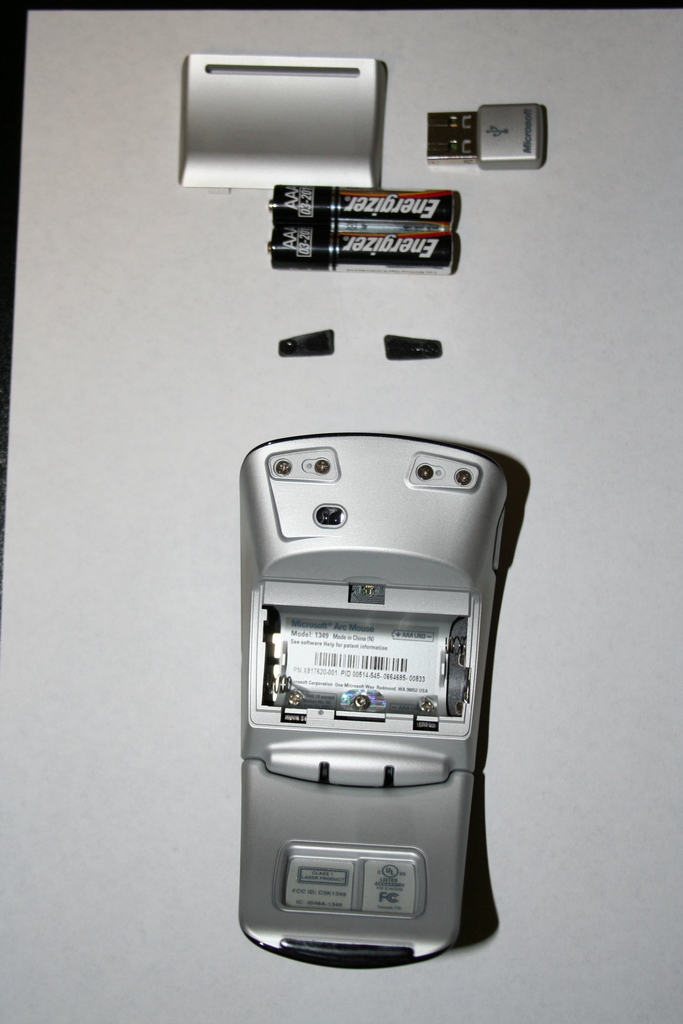
Remove the skid pads on the front part of the mouse, they are held there with a bit of adhesive (like tape), I used a small screwdriver to pull up the edge of the skid pad then just pulled them off.  You can also use a small knife or hobby blade (think x-acto knife).  Keep them clean so you can reapply them later.  (Special thanks to sahil & Chuong for suggesting this part)

Once you remove the battery cover and batteries, there will be 3 screws under the label as shown in the pictures below. In addition, there are 4 screws under the black skid pads in the front part of the mouse.

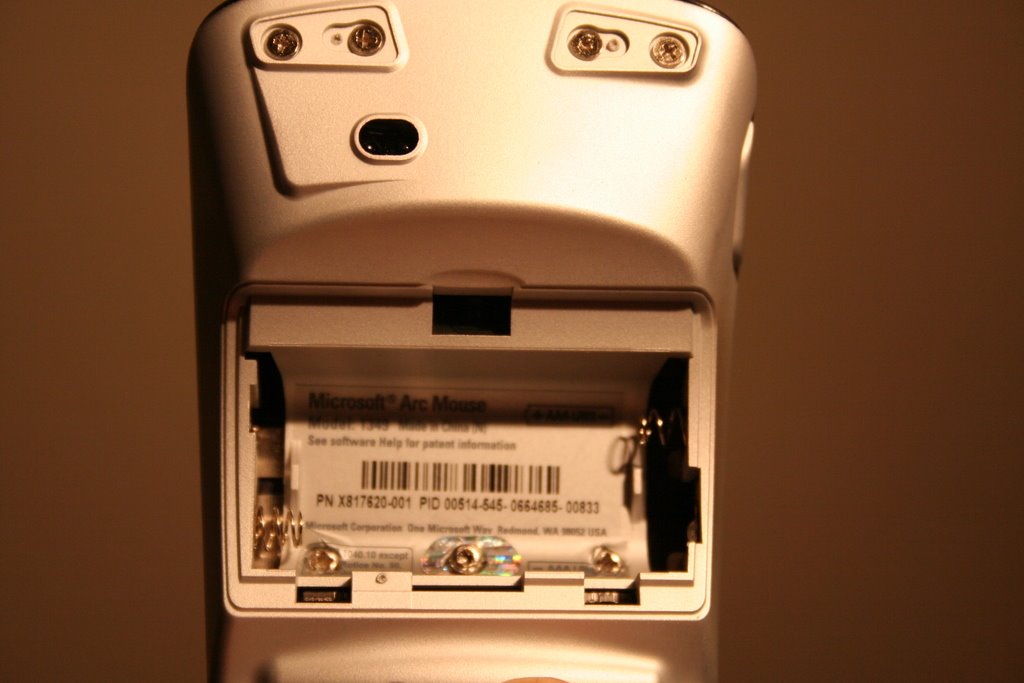
The trick is removing the 3 screws under the label … the 2 side screws are of phillips type and the middle screw is different and requires a hex screwdriver. Not sure why MS decided to do this, but it makes taking apart the mouse harder since you need another tool.

After all screws are removed, the top cover will come off and you will see this:

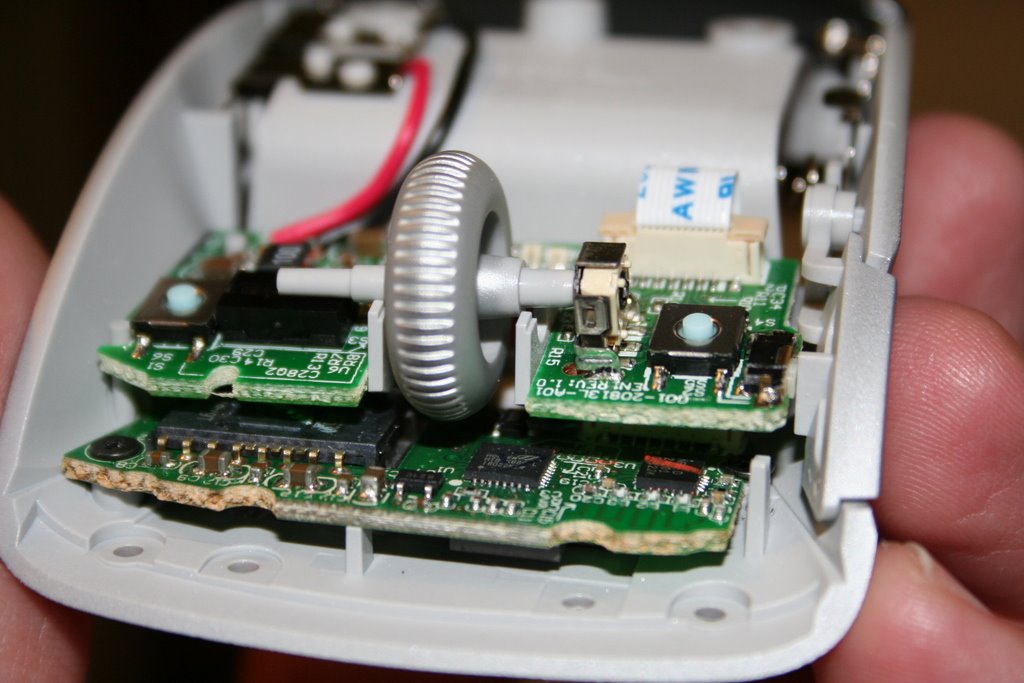
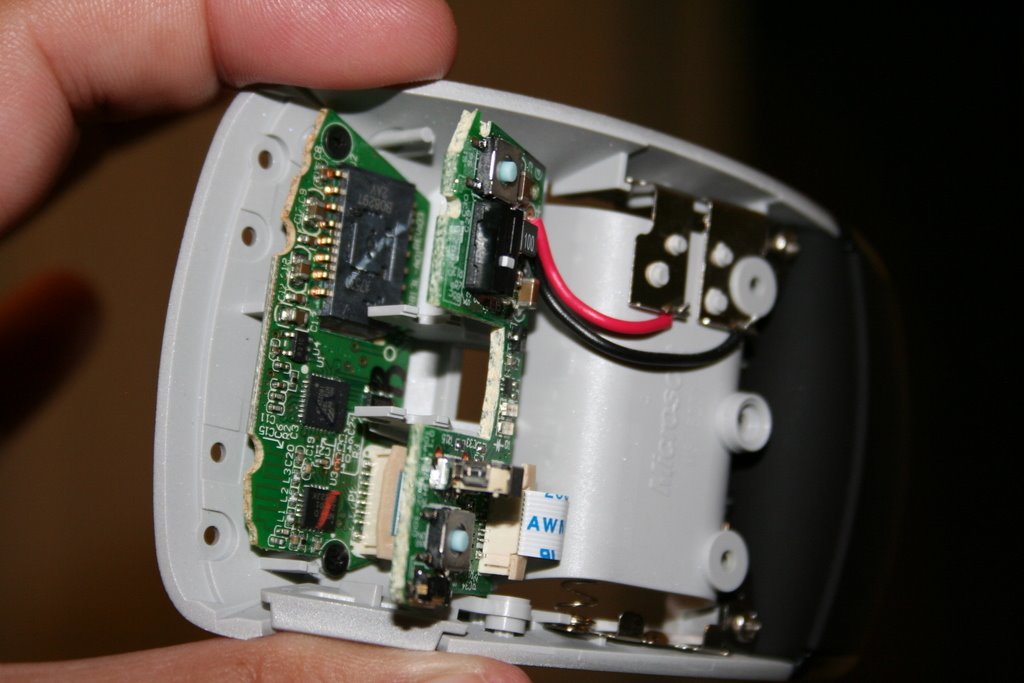
The upper board just floats and is held down by the cover and wheel, to remove the wheel, just lift the upper board.

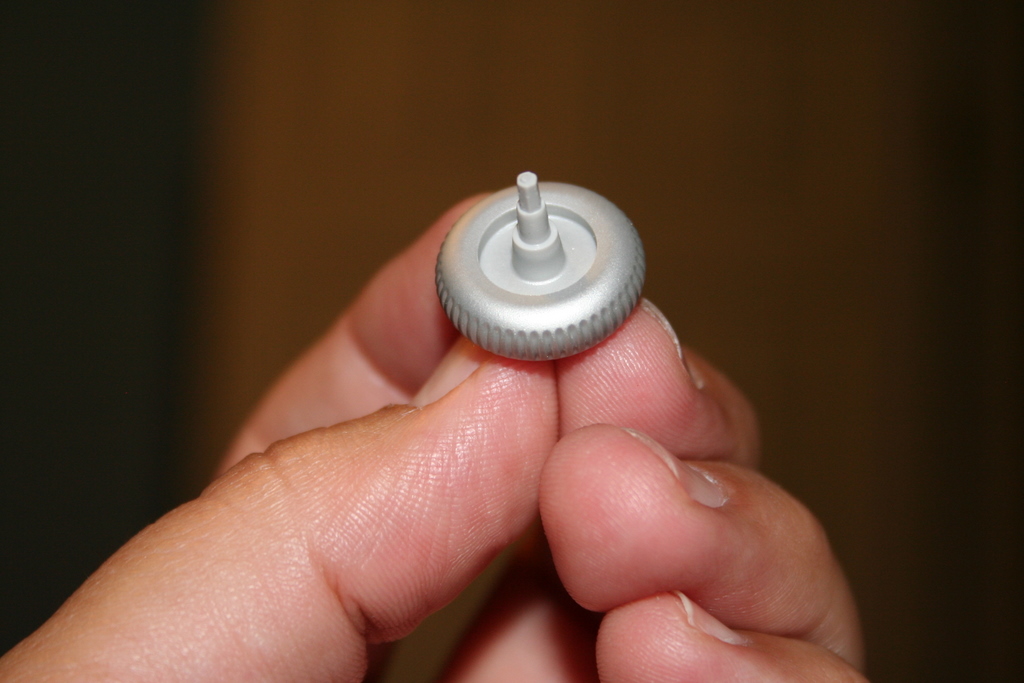
In my opinion, the problem with the mouse wheel lies in the material it is made of and the length of the hex shaped part of the shaft that fits into the mechanism that detects the wheel movement. My mouse wheel shaft was a little bit worn, but it was worn just enough and short enough to free spin and not turn the wheel mechanism.

I guess MS did not test the fact that people would be putting different pressures at different angles on this scroll wheel, hence the different failure rates with different people.

So what did I do to fix the problem?

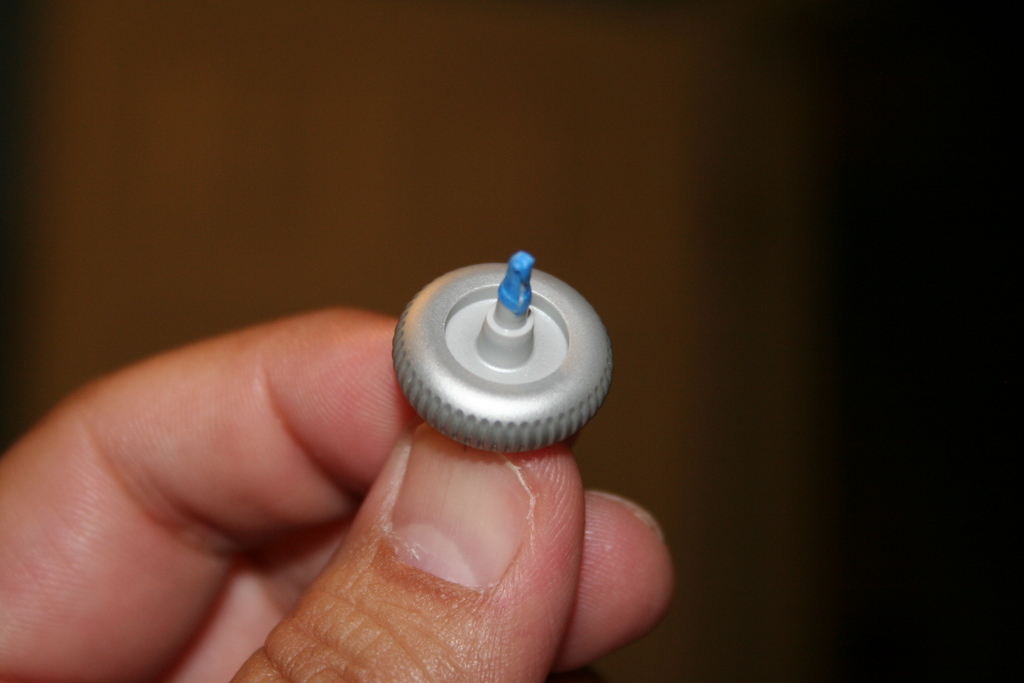
I used some blue painter’s tape to provide a tighter fit and lengthen the end just slightly. This is a good enough fix to allow me to get more mileage out of the mouse and, as a side benefit, it gets rid of the loud plastic clicking sound the mouse made before.

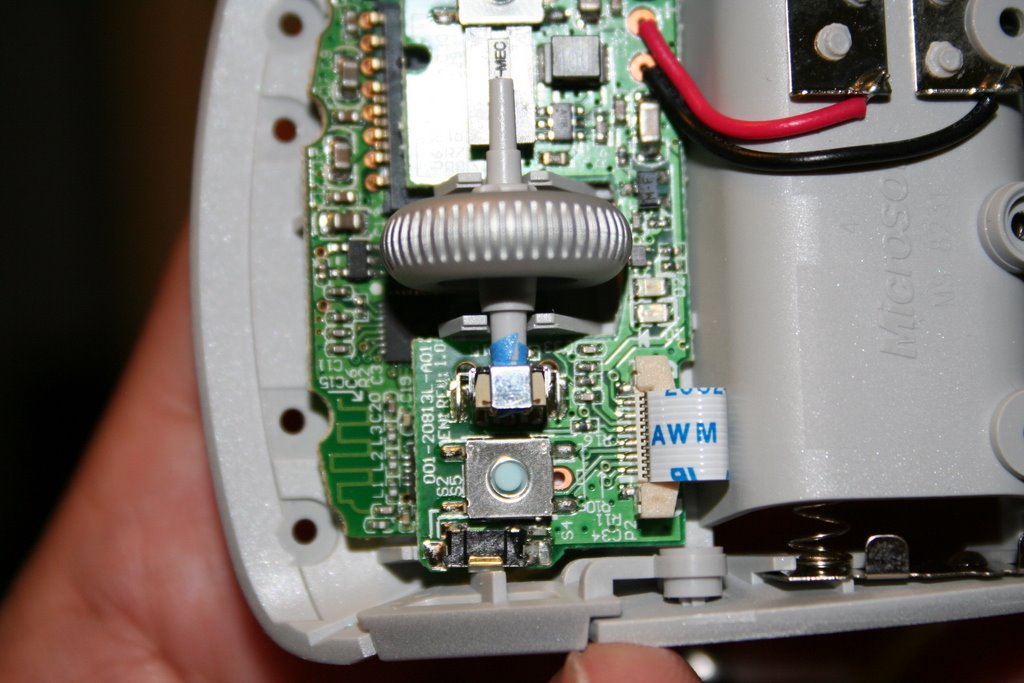
To finish up … make sure the wheel spins freely, put the cover back on, put all the phillips screws back (not the hex one), replace the skid pads, add the batteries, and put the battery cover back on.

I hope this helps a lot of folks out there decide what to do with these cool yet dysfunctional mice!

Take care & be safe.

– Dom

*****

Additional Information on this post:

Matt wrote to me recently to tell me “I used superglue instead of tape, spin the tip around the part you taped and then once you have a thin but even coating around breathe (like a hot slow breath, not like blowing out candles) to help the glue set (super glue sets with water, the moisture in your breath will help speed things up). After a minute it should be dry and then just put the scroll wheel back in and its as good as new :)”. Thanks Matt.

HVAC "service professional" experience

Ok, here is my account of a recent bad experience with a local HVAC / Climate Control company and how I did some additional research and troubleshooting to replace a White-Rodgers control board on the York Diamond 80 Furnace/AC unit in my house to save about $300.

*** START DISCLAIMER ***

Of course, it goes without saying for things of this nature … if you are NOT TECHNICALLY INCLINED/COMPETENT (or have the right tools) to do this yourself, please employ a professional since the risks are high to you personally and/or your home.

*** END DISCLAIMER ***

The initial problem started when we tried to start the heater for the first time this season. The furnace was not blowing hot air to heat the house. It was blowing cold air.

Here it the HVAC unit in my house:

I checked the control board and it was flashing some lights indicating something was wrong (error codes). The LED is on the lower left of this picture in red.

The flashing code sheet on the control unit indicated the pressure switch was stuck closed.

Here is the upper (heat) portion of the HVAC system:

The pressure vacuum switch is just by the exhaust blower motor, and it connected to it by a clear vacuum hose (upper part of the picture). I checked the switch with a meter (continuity test) and put some vacuum on it and it open and closed properly, so this was not the problem.

Since this all happened on the weekend (Saturday) and I was leaving town on Tuesday and it was starting to get cold here, I called a local HVAC company to fix this for me. I did not want my wife and kids dealing with a cold house (and a service person) while I was out of town for the rest of the week.

I found one of the HVAC service companies working on the weekend, so I asked for a service technician to come over to fix the unit.

The guy arrived and started to check things out, I watched intently so I could learn something since this was running me about $80 just for the visit.

He saw the same flashing error code, then checked the switch, then checked the voltage going to the exhaust blower. Went through several startup sequences. After all that he said the problem is likely a bad control board or a bad exhaust blower.

I asked if there was a test he could perform to just test the exhaust blower to rule it out as a problem. He said it was highly unlikely that the exhaust blower was bad, more likely the control board. I found it quite frustrating that I was paying him to diagnose the exact problem only to get this answer. All I was looking for was a simple test to make sure the exhaust blower was working.

He got on his portable laptop to lookup the replacement control board for this unit to fix it, and he was unable to find the exact replacement. He said the company can call on Monday for a quote to fix it. He swiped my credit card, charged $80 for the visit and left.

He really did not help my situation, but I learned something from the visit. As much as you think these folks know what they are doing, they still fail to satify the customer/me (by ruling out the exhaust blower as the problem).

He also missed a significant problem. I found the large blower (main air mover to the house) had charring on the capacitor terminals with some melted leads (due to someone cinching down the cable tie too much at some point in the past). Since the blower was working, I assumed the capacitor was still good, so I cleaned up the connections and replaced the terminators as shown below.

Still without heat, I went to work testing the exhaust blower. Since it was a 60 Hz 110 AC motor, I found a old small appliance plug, cut it, striped the leads, and connected it to the motor connectors to briefly see if the motor would turn (I would like to point out that I know about testing this safely and want to point to the disclaimer for your situation). After some work, the motor turned and that was not the problem. I went online to see about finding a control board.

The control board I had was a White-Rodgers 50A50-241, I went to www.white-rodgers.com to find more info about this board. It was an old board, and it was replaced by a 50A55-843 control board. Searching around, I found it as much as $100 and as high as $250 on the internet. Since I needed this board fairly quickly, I called some local service & repair places to find it locally. Not many of these people are open on the weekend, so I had to wait until Monday.

Monday morning, the HVAC company called, it would cost $500+ to fix the unit, and it would require a “part acquisition fee” since the part was in a nearby large city (is this a new way of getting more $ out of you?). This did not work for me since I was leaving town the next day. The internet did not work also, since the part would take a day minimum to get here.

Meanwhile, I did find the control board at local plumbing/heating/cooling retailer, it was $200. I drove to the retailer to pickup the board and went home to install it before leaving town the next day.

I can say, the newer control board has plenty of information on the website, such as a troubleshooting document that would have been very helpful with the older one I was having trouble with.

I took pictures of all the connections of the old board, labeled all the connections also. Then drilled two new holes to mount the new control board since it was smaller than the old one (used 2 of the old holes to mount the new board).

All the connections were the same if not very similar, so pretty easy to replace a old board with a new one. Here is what it looked like after installing it (remember to disconnect the power before doing anything electrical).

Thinking back to this summer, there was a lightning strike very near to the house that took out a printer (connected to the phone line) & a cordless phone. Maybe it had something to do with the heater part of the control board, who knows?

All in all, I managed to provide my family with heat at a cost less than a “service professional”. I was rather fortunate that a local retailer had the control board for a reasonable price under the time constraints I had.

I hope this post helps some folks out there with my experience.

Take care & be safe.

– Dom